


Your July planting guide, vermiculture, soil & fertilizer recipes, and more...
Edition 4: July 2024


In this newsletter:
Your July seed planting guide
My soil fertilizer and soil mix recipes
How to compost using vermiculture
Skip these 6 popular social media “gardening hacks”
Preserving your onion harvest to last for months
See You Next Tuesday: Scary sunscreen
Sneak peek at your mid-July newsletter

(aka The Zen Hen). Rainy season is in full swing (FINALLY!) here in Florida and many local gardeners who rely on city water are looking forward to lower water bills. While I use well water, I am personally looking forward to scratching “water plants” off my to-do list more often.
If you too appreciate cost savings and efficiency like I do, then you’ve come to the right newsletter. My goal is to help others become abundant and self-sufficient growers, in the most cost-effective, time-reclaiming, and environmentally-kind ways.
Try it for a month and get two of my newsletters, plus previous editions, for only $8. Or save yourself some money, invest $80 for a year’s worth (you’ll get 2 months free) of gardening content, and see why more than a million people follow me for gardening know-how across my social platforms. I appreciate your support!
July Seed Starting for Zone 9 Gardens
It’s hot out. Here’s what to plant.

Amaranth | Corn | Ginger
Katuk | Malabar spinach | Okra
Peppers | Pidgeon peas | Pumpkins
Southern peas | Sugar cane | Sunflowers
Sweet potatoes | Turmeric | Winged beans
*Summer is a great time to transplant your fruit trees.
Question from my dear subscriber, : On your Amazon link you have so many products to use for seed growing and soil. For someone just starting and who plans to seed grow what are the most important products? Just soil or something like the bone meal or perlite etc. I know next to nothing 😂

Great question, Andrea. I’ve got two options for you. I’ve made a list of my favorite essential gardening tools for beginners here.
Once you’re set on tools and want to level up, I would recommend improving the quality of your soil. You can do that either by adding my fertilizer mix to store-bought soil (though I try to avoid that) or by making my full soil mix. Here’s my recipe and affiliate links for easy shopping that helps my small business too…
Seed Starting Fertilizer Mix
4 parts Azomite
2 parts Green sand
1 part blood meal
1 part bone meal
1/2 part biochar
Mix the above fertilizer mix and add it to your soil OR…
Seed Starting Soil Recipe
10lb block coconut coir
10 gallons of compost
2 gallons of perlite
2 gallons of vermiculite
4 cups of the natural fertilizer mix above
Get yourself a giant bin or wheelbarrow.
Wet the coco coir until it’s damp and crumbly.
Mix in the remaining ingredients.
Watch this video to see it done.
Here are all of my seed-starting tools from my Amazon store.
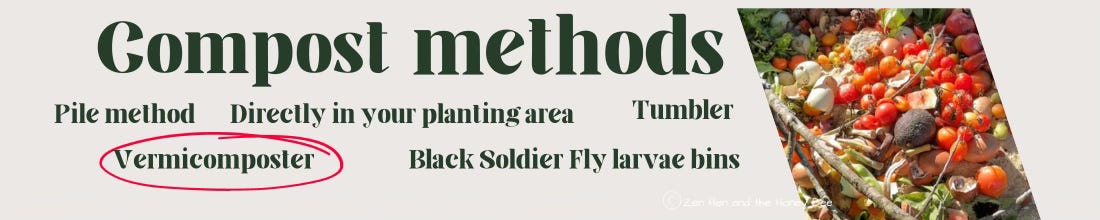
Vermicomposting
This edition’s method of composting and the one I’ll cover in the next newsletter, Black Soldier Fly larvae bins, may be two of the more intimidating composting methods to try if you’re newer to gardening. Don’t let your fear keep you from taking advantage of these two impactful ways to nourish your crops!
Here’s my guide on how you can use the vermicomposter method and impress your friends and plants alike.


WHY VERMICOMPOSTING?
Vermicomposting is a fantastic method for your garden if:
You want to speed up your rate of producing compost (though you’ll get compost in smaller quantities)
You want the added benefit of vermicompost AND worm castings without having to buy them
You’ve dreamed of being a worm farmer ever since you saw Slimey on Sesame Street
The downside is that you’re composting with living creatures which means you need to be on a feeding schedule and making sure that their environment remains suitable to keep them alive. It’s definitely more work than the previous three methods I’ve covered, but if you’re curious and you want some really fine-quality food for your plants, it’s worth it!
STEP-BY-STEP GUIDE TO VERMICOMPOSTING
Build or buy a stackable bin system for your worms. (Note: you can also vermicompost using in-garden terracotta pots as I discussed in this newsletter. It will just be on a smaller scale).
Start with a small amount of soil medium (dampened coconut coir or pH-neutral soil), worms (I like red wigglers), and some compostable food or yard clippings (see list below).
As the worms start to fill up the first layer with vermicompost/worm castings, you add a second layer of medium and start adding your compostable items (see list below) to this second layer only.
The worms gradually move up into each new level to the feed, allowing the lower levels to be worm-free. Once you have a worm-free lower layer, you can begin to use the compost for your plants as needed.
Keep adding layers to the top of the stack as needed and removing the bottom layers to use the compost after the worms have migrated upwards.
THINGS I LEARNED THE HARD WAY ABOUT VERMICOMPOSTING
Cue the sad violin.
Temperature matters. Anything below about 40-50°F will slow your worms WAY down and make them go dormant. Anything above 85-90°F can kill them.
In the winters here in Florida I keep them in my greenhouse. During the summers, I make sure they have a deep area to dig to get out of the heat and/or provide a well-shaded area. If you live in a northern climate, look for vermicompost systems that are made for indoor use.
Pre-chop your compostable food items for the worms and they will convert it to compost much more efficiently.
Provide them with grit or sand. Fun fact: worms don’t have teeth. Grit helps them digest their food.
Don’t add too much food at once or it will rot and smell instead of being consumed. Red worms can eat about half their body weight per day.
Feed them at least weekly! I feed mine twice weekly, on Tuesdays and Saturdays, so I don’t forget. As your worm empire… I mean… the colony grows you’ll get a better feeling for whether they need more or less food during each feeding. They will need to be fed at least once weekly or you risk starving them.
Moisture level matters. Your compost materials should be damp like a partially wrung-out sponge.
Worms require a pH-neutral environment.
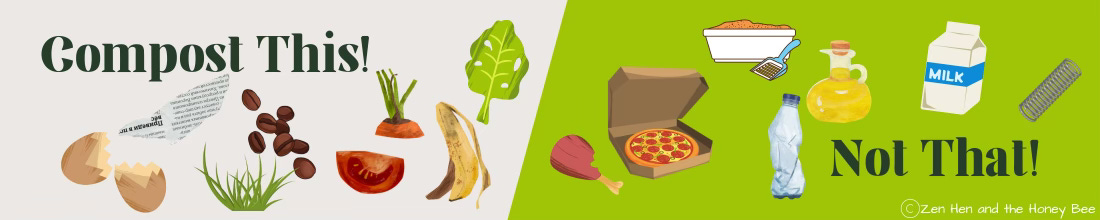
ADD: fruit and veggie scraps, plant clippings, eggshells, coffee grounds, shredded non-glossy paper and cardboard, tea bags.
AVOID: dairy, citrus, meats, pet or animal waste, oily foods, highly salted foods, plastic or metals, or glossy paper.
Skip These 6 Social Media “Garden Hacks”
There are lots of people on the internet with great intentions and a healthy dose of old wives’ tales that they share as gardening facts and hacks. While they’re meant to make your life easier, they often just create more work with less optimal results. Here are my tips on what to avoid and what to try instead.
Skip planting an egg with your tomatoes. Eggs take a year or more to break down before they can be used by plants. Instead, crush and dissolve eggshells in vinegar.
Skip spraying calcium and other fertilizers onto leaves. Instead, always feed at the base of your plant to be absorbed by the roots
Skip adding pebbles to the bottom of planters to add drainage, they don’t. Instead plant in a porous/terracotta pot or a pot with drainage holes, add perlite, sand, ground lava rock, or orchid bark to your soil to increase drainage.
Skip frequent shallow watering. Instead, enrich your soil with compost, mulch the bases of plants, and water deeply less frequently.
Skip toxic pesticides. Instead, use companion plants and encourage carnivorous insects and animals like ladybugs, lacewings, wasps, dragonflies, and assassin bugs to take up residence.
Skip overpriced (and often contaminated) bagged soils. Instead, find a local bulk source of compost and mulches. People with horses, rabbits, and mushroom farms are great resources for compost.
In Case You Missed It
If you enjoyed the last edition’s high-yield harvest article, then you’ll want to watch this video that I recently posted on my social media pages. It shows you what to do with your ample onion harvest to preserve them for months in your kitchen pantry. Click on the image to watch!

See You Next Tuesday
Will this help your garden? Only occasionally. Will you be thoroughly entertained? Probably. These are my stories of the absurd, incorrect, and downright scammy things floating around the homesteading internet.
There is some scorching sunscreen drama in the land of TikTok. As a biochemist with professional experience in formulating sunscreens (yes, I have an odd resume), I could only cringe as I watched an overly simplified sunscreen recipe be shared by a mega influencer and then ripped off and repeated by another influencer.
Why am I so hot and bothered by this sunscreen scandal? Because the recipe was easy enough to make that some well-intentioned parents will be whipping it up to slather on their babies and kids, unknowingly causing them harm. Oh, how I hate when misinformation is shared for views and money.
The recipe they shared involved blending coconut oil, zinc oxide, and a handful of other ingredients. Seems easy enough and all of the ingredients have been used in sunscreen formulations successfully. However, the way this one was made lacked some necessary components to make it an actual screen and not a Swiss cheese blanket for your skin. The result is an incomplete formula that will most definitely result in skin damage.
Moral of the story… there is so much out there from influencers and inexperienced copywriters who pull their knowledge from Google rather than actual years of research and scientific studies. Our health and well-being are at stake.
What’s In the Next Edition?
Here’s what’s coming to your inbox on Tuesday, July 16:
Black Soldier Fly Composting
Gardening tools: buy this/not that
My favorite pet treat recipes for cats, dogs, and chickens
Have questions? Drop them in the comment section below and I’ll cover them in my next newsletter.
Leave a comment. I dare you 😏
Have a three-part question in regards of soil.
Above you shared your wheelbarrel sized recipe for seed starting mix. That calls for four cups of your fertilizer.
What if I wanted to just make a five gallon bucket of soil? How much of your fertilizer do I use?
Also I asked in a live the other day and I just want to confirm what I wrote down... To initially start up a bed you recommend using three parts horse MANURE one part course sand. Did you mean actual manure or composted down horse manure?
I reached out to a couple of horsey friends and they have big piles but it's not all well aged stuff. Should I skip getting the fresh stuff on the top and try to just get the bottom of their piles?
I'm about to make a lot of beds and I want to start off right.
Should I buy worms to put in? What kind of worms and where?
Excited for future newsletters.
Shannon
Btw I think I may have signed up twice... Cuz when I just subscribed a couple minutes ago I already had an account. I'm new to this substack thing so I'm not sure how to check it.
Hi! Do you start your seeds indoors or outside? I bought little trays and currently they’re in my laundry room window under plastic domes. Thanks!!